 US Dollar
 Canadian

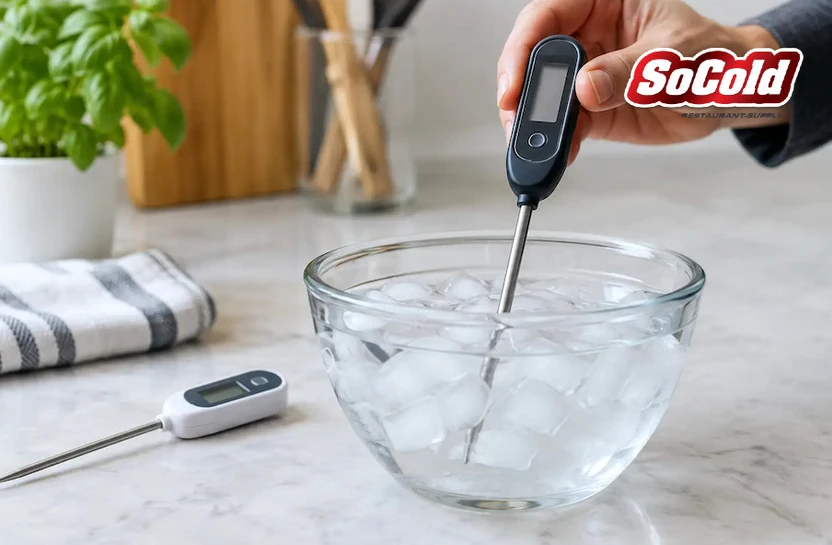
A thermometer that reads 38°F when a cooler is actually holding 42°F can turn a routine line check into a food safety failure. Knowing how to calibrate food thermometers gives kitchen teams a fast way to verify the tools behind receiving checks, cooking temperatures, cooling logs, and hot-holding records.
For most operations, the ice-point test is the everyday standard. It is quick, repeatable, and practical for probe thermometers used around refrigeration, prep, and cook lines. A boiling-point test is also useful, but only when staff account for altitude and local water boiling temperature.
When Food Thermometers Need Calibration
Calibrate a thermometer when it is new, dropped, exposed to a major temperature change, or used heavily during a shift. Do not wait for a failed inspection or a questionable product temperature. Thermometers can drift gradually, especially mechanical dial models, and a small error matters when a reading sits close to a critical limit.
A practical schedule depends on the operation. A high-volume kitchen using probes for receiving, prep, cooking, and cooling may check them daily or at the start of each shift. Lower-volume operations may set a weekly check, provided thermometers are protected and staff verify them after any impact. Follow local health department requirements and the manufacturer’s instructions when they are more specific.
Keep a simple calibration log with the date, thermometer identification, test method, observed reading, adjustment made, and employee initials. That record helps managers spot a unit that repeatedly drifts and shows inspectors that temperature controls are being actively managed.
The Ice-Point Method to Calibrate Food Thermometers
The ice-point method checks whether the thermometer reads 32°F in a properly prepared ice-water slurry. It is the most useful method for most foodservice operations because it does not require a stove, a large pot, or a correction for elevation.
Start with a clean container. Fill it completely with crushed ice, then add clean water until the mixture becomes slushy. There should be enough water for the probe to enter without resting against ice at the bottom, but not so much water that the ice floats freely. Stir the slurry and let it stand briefly so the temperature stabilizes.
Insert the sensing area of the thermometer into the center of the slurry. On a dial thermometer, the sensing area is commonly the lower two to three inches of the stem. On a digital probe, check the manufacturer’s instructions because the sensor may be located near the tip. Keep the probe from touching the sides or bottom of the container.
Wait until the display stops moving. The correct reading is 32°F. A reading within the accuracy range specified by the manufacturer may be acceptable, but a thermometer used for food safety decisions should generally be accurate to within plus or minus 2°F across its intended range. Confirm the applicable requirement for your jurisdiction and operation.
If the thermometer reads 32°F, clean and sanitize the probe before returning it to service. If it does not, adjust it if the model allows adjustment. Then repeat the test to confirm the correction.
Use the Boiling-Point Method With Caution
Boiling water provides a second calibration point and can be useful for thermometers that regularly measure cooking temperatures. At sea level, clean water boils at 212°F. That number is not universal: boiling temperature drops as elevation increases, and local barometric conditions can make a small difference.
Bring clean water to a rolling boil in a deep pot. Insert the probe into the water without contacting the pot’s bottom or sides. Wait for the reading to stabilize, then compare it with the expected boiling point for the location. Do not assume 212°F if the facility is at elevation.
This method creates obvious burn and steam hazards, so it is usually better suited to a controlled maintenance check than a rushed line verification. It also does not replace the ice-point test for cold-side tools. A receiving thermometer that is accurate near boiling may still be off near refrigeration temperatures.
Adjusting Dial and Digital Thermometers
Many bimetallic stem thermometers can be adjusted. While the probe remains in the ice slurry, use the calibration nut or wrench at the back of the dial to turn the dial until it reads 32°F. Avoid twisting the stem itself. Remove the thermometer, clean and sanitize it, then perform the test again to verify the adjustment held.
Digital thermometers vary. Some have a calibration button or menu that lets the user set a known reference point. Others display an offset, while many low-cost models cannot be adjusted at all. If a non-adjustable thermometer is consistently off by a small amount, a manager may document the offset only if company policy and local code permit it. In most busy kitchens, replacement is the cleaner and safer choice, particularly when the error exceeds the acceptable tolerance.
Infrared thermometers require a different approach. They measure surface temperature, not internal food temperature, and their readings depend on the surface being scanned. An infrared unit should not be calibrated by simply aiming it at ice water, because water and ice surfaces can produce misleading results. Use the manufacturer’s approved verification method, and keep a calibrated probe thermometer available for internal temperatures.
Common Calibration Mistakes That Create Bad Readings
Most calibration failures come from technique, not from the thermometer itself. An ice bath made with a few cubes floating in a cup of water will not reliably reach 32°F. A probe touching the container wall can pick up a warmer or colder surface temperature. Reading too soon, before the display stabilizes, creates another avoidable error.
Cross-contamination is the other issue. A probe used to check raw poultry cannot go directly into an ice slurry, cooked food, or ready-to-eat product. Wash, rinse, and sanitize the stem according to the operation’s procedure before and after calibration. Store clean probes in a protected sleeve or designated holder instead of leaving them loose on a prep table.
Staff should also know the difference between calibration and verification. Calibration adjusts a thermometer to a known standard. Verification checks that a thermometer is still reading correctly. In daily kitchen language the terms are often used interchangeably, but the action matters: a failed verification means the tool must be adjusted, removed from service, or replaced.
Build Calibration Into the Shift, Not the Emergency
The best calibration process is simple enough to happen consistently. Assign thermometer checks to an opening manager, receiving lead, or prep supervisor. Label each thermometer with an ID number so the log identifies the specific unit, not just “probe thermometer.” Keep crushed ice, a small container, sanitizer, clean towels, and the log form accessible where checks are performed.
For operations with several stations, avoid sharing one questionable thermometer across the whole kitchen. Keep suitable probes where they are needed: thin-tip probes for thin foods, durable stem thermometers for general prep, and specialized units for equipment or surface checks. The right instrument reduces both handling time and inaccurate measurements.
Thermometers are low-cost tools compared with discarded product, corrective action, or a failed inspection. Make calibration part of the same routine as checking cooler temperatures, sanitizer concentration, and hot-holding equipment. A verified reading gives the team something more useful than a number: confidence that the decision based on it is the right one.